Toyota CH-R Service Manual: Rear Seat Inner Belt Assembly(for Rh Side)
Components
COMPONENTS
ILLUSTRATION

|
*A |
w/o Seat Belt Warning System |
*B |
w/ Seat Belt Warning System |
|
*1 |
BENCH TYPE REAR SEAT CUSHION ASSEMBLY |
*2 |
REAR CENTER SEAT OUTER BELT ASSEMBLY |
|
*3 |
REAR SEAT CUSHION LOCK HOOK |
*4 |
REAR SEAT INNER BELT ASSEMBLY |
.png) |
Tightening torque for "Major areas involving basic vehicle performance such as moving/turning/stopping" : N*m (kgf*cm, ft.*lbf) |
● |
Non-reusable part |
Removal
REMOVAL
PROCEDURE
1. DISCONNECT REAR CENTER SEAT OUTER BELT ASSEMBLY
Click here .gif)
2. REMOVE BENCH TYPE REAR SEAT CUSHION ASSEMBLY
Click here
3. REMOVE REAR SEAT CUSHION LOCK HOOK
Click here
4. REMOVE REAR SEAT INNER BELT ASSEMBLY
(a) w/o Seat Belt Warning System:
|
(1) Loosen the bolt and remove the rear seat inner belt assembly. HINT: The bolt cannot be removed from the rear seat inner belt assembly. |
|

(b) w/ Seat Belt Warning System:
|
(1) Disconnect the connector. |
|
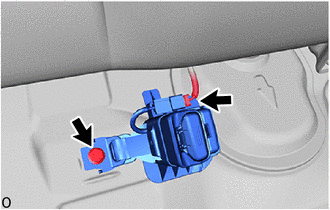
(2) Loosen the bolt and remove the rear seat inner belt assembly.
HINT:
The bolt cannot be removed from the rear seat inner belt assembly.
Inspection
INSPECTION
PROCEDURE
1. INSPECT REAR SEAT INNER BELT ASSEMBLY (w/ Seat Belt Warning System)
(a) Check the resistance.
|
(1) Measure the resistance according to the value(s) in the table below. Standard Resistance:
If the result is not as specified, replace the rear seat inner belt assembly. |
|

Installation
INSTALLATION
PROCEDURE
1. INSTALL REAR SEAT INNER BELT ASSEMBLY
(a) w/o Seat Belt Warning System:
|
(1) Tighten the bolt and install the rear seat inner belt assembly. Torque: 42 N·m {428 kgf·cm, 31 ft·lbf} NOTICE: Do not allow the anchor part of the rear seat inner belt assembly to overlap the protruding parts of the vehicle body. |
|

(b) w/ Seat Belt Warning System:
|
(1) Tighten the bolt and install the rear seat inner belt assembly. Torque: 42 N·m {428 kgf·cm, 31 ft·lbf} NOTICE: Do not allow the anchor part of the rear seat inner belt assembly to overlap the protruding parts of the vehicle body. |
|

(2) Connect the connector.
2. INSTALL REAR SEAT CUSHION LOCK HOOK
Click here .gif)
3. INSTALL BENCH TYPE REAR SEAT CUSHION ASSEMBLY
Click here
4. CONNECT REAR CENTER SEAT OUTER BELT ASSEMBLY
Click here
 Installation
INSTALLATION
PROCEDURE
1. INSTALL REAR SEAT INNER WITH CENTER BELT ASSEMBLY LH
(a) w/o Seat Belt Warning System:
(1) Tighten the bolt and install the rear seat inner with center belt
...

Other materials:
Toyota CH-R Service Manual > Audio And Visual System(for Radio And Display Type): System Description
SYSTEM DESCRIPTION
USB AUDIO SYSTEM FUNCTION OUTLINE
(a) The No. 1 stereo jack adapter assembly is equipped with a USB connector.
Connecting a USB device or "iPod" to the No. 1 stereo jack adapter assembly allows
music files to be played. Not only is it possible to play music from a ...
Toyota CH-R Service Manual > Smart Key System(for Entry Function): Problem Symptoms Table
PROBLEM SYMPTOMS TABLE
HINT:
If a problem occurs in certain locations or at certain times of day,
check for the possibility of wave interference.
When the electrical key transmitter sub-assembly is brought near an
electrical key and TPMS receiver assembly (RF band), door outsid ...
Toyota CH-R Owners Manual
- For safety and security
- Instrument cluster
- Operation of each component
- Driving
- Interior features
- Maintenance and care
- When trouble arises
- Vehicle specifications
- For owners
Toyota CH-R Service Manual
- Introduction
- Maintenance
- Audio / Video
- Cellular Communication
- Navigation / Multi Info Display
- Park Assist / Monitoring
- Brake (front)
- Brake (rear)
- Brake Control / Dynamic Control Systems
- Brake System (other)
- Parking Brake
- Axle And Differential
- Drive Shaft / Propeller Shaft
- K114 Cvt
- 3zr-fae Battery / Charging
- Networking
- Power Distribution
- Power Assist Systems
- Steering Column
- Steering Gear / Linkage
- Alignment / Handling Diagnosis
- Front Suspension
- Rear Suspension
- Tire / Wheel
- Tire Pressure Monitoring
- Door / Hatch
- Exterior Panels / Trim
- Horn
- Lighting (ext)
- Mirror (ext)
- Window / Glass
- Wiper / Washer
- Door Lock
- Heating / Air Conditioning
- Interior Panels / Trim
- Lighting (int)
- Meter / Gauge / Display
- Mirror (int)
- Power Outlets (int)
- Pre-collision
- Seat
- Seat Belt
- Supplemental Restraint Systems
- Theft Deterrent / Keyless Entry

0.0138